Learning how to install Google Tag Manager in your SuiteCommerce Advanced site is the first step towards understanding who your customers are, what they want to see, and how they behave on your website. The best part? You don’t need to be a SuiteCommerce developer to do it!
There are two main ways of doing this, and each depends on the SuiteCommerce version on which your site is running, i.e., up to version 2018.2, or later.
Both guides are available on the SuiteCommerce developers portal, a page where NetSuite offers free resources, guides, workarounds, and troubleshoot material.
In this post, we will focus on SuiteCommerce versions 2018.2 or later.
To install Google Tag Manager in SuiteCommerce Advanced 2018.2 or later, you should follow these six steps:
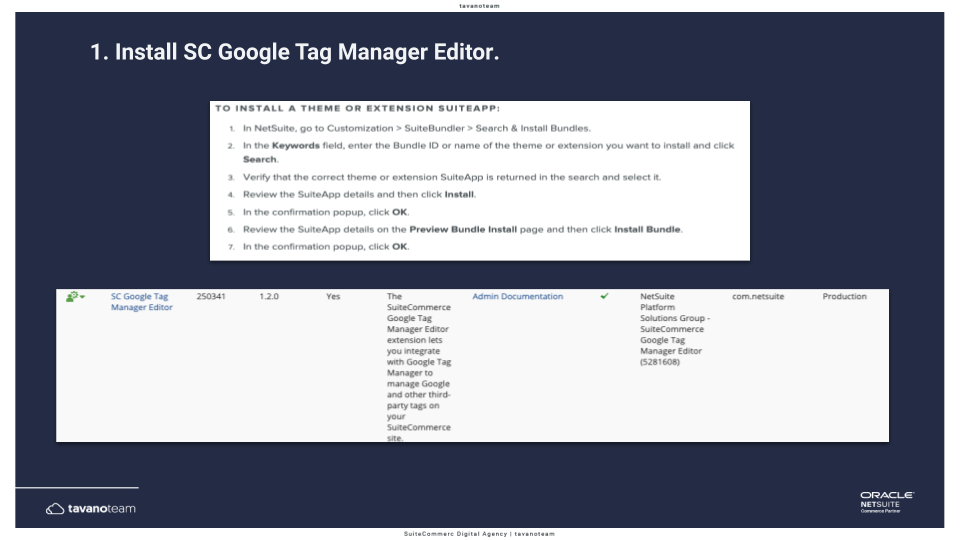
1. Install SuiteCommerce Google Tag Manager Editor.
2. Sign up for Google Tag Manager.
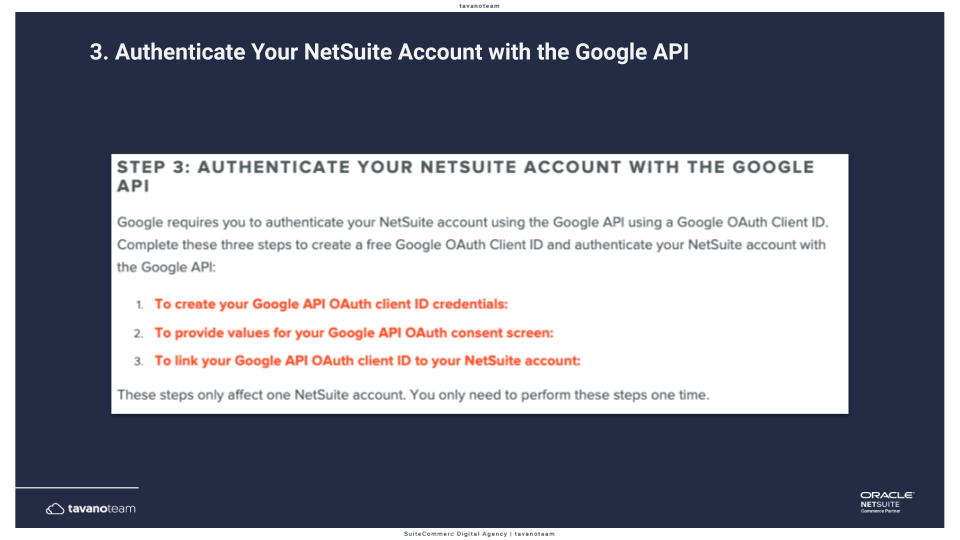
3. Authenticate your NetSuite account with the Google API.
4. Link your Google Tag Manager account to a domain.
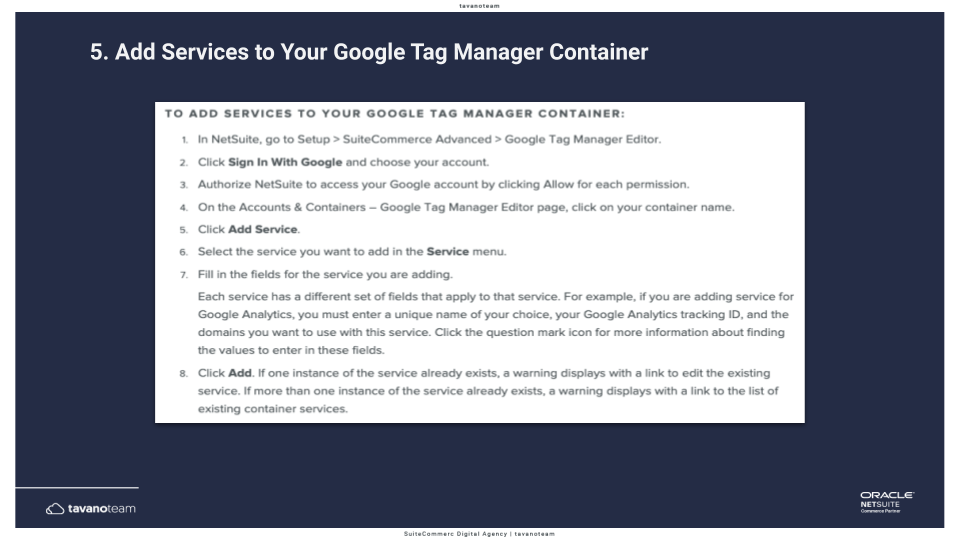
5. Add the services to your Google Tag Manager container.
6. Review and publish your changes.
The SuiteCommerce Tag Manager editor is a bundle on the NetSuite backend. To install it, you need to go to Customization > SuiteBundler > Search and install bundles and search for the SuiteCommerce Google Tag Manager Editor.
The screenshot below shows where we installed this bundle on one of our accounts. You can search for the bundle ID number but keep in mind that the information can be updated, and the number can change. So it’s a good practice to search with the name.
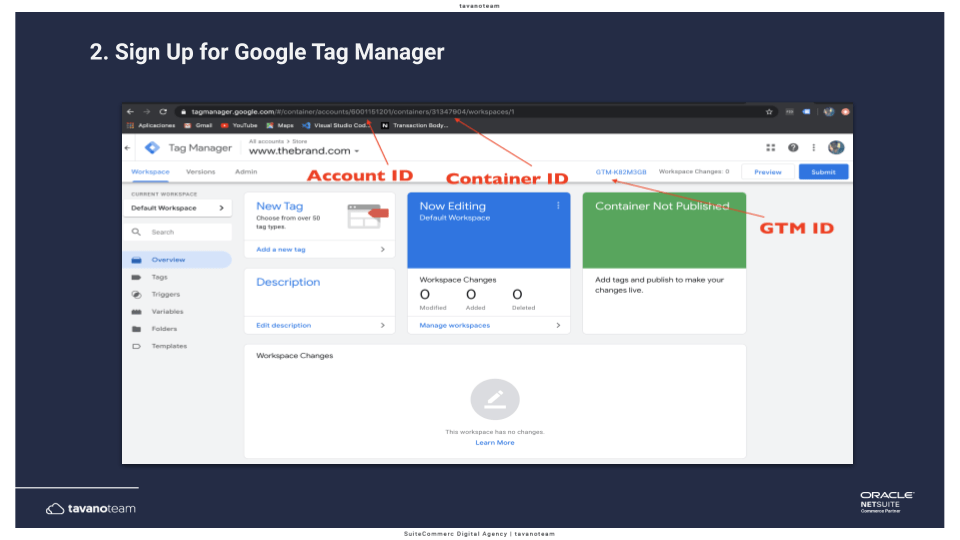
Log in to your Google account, go to Google Tag Manager, and create an account. This pretty straightforward.
Write down these parameters; you’ll need them later: the Account ID (from the URL), the container ID, and the Google Tag Manager ID. We will use these variables later.
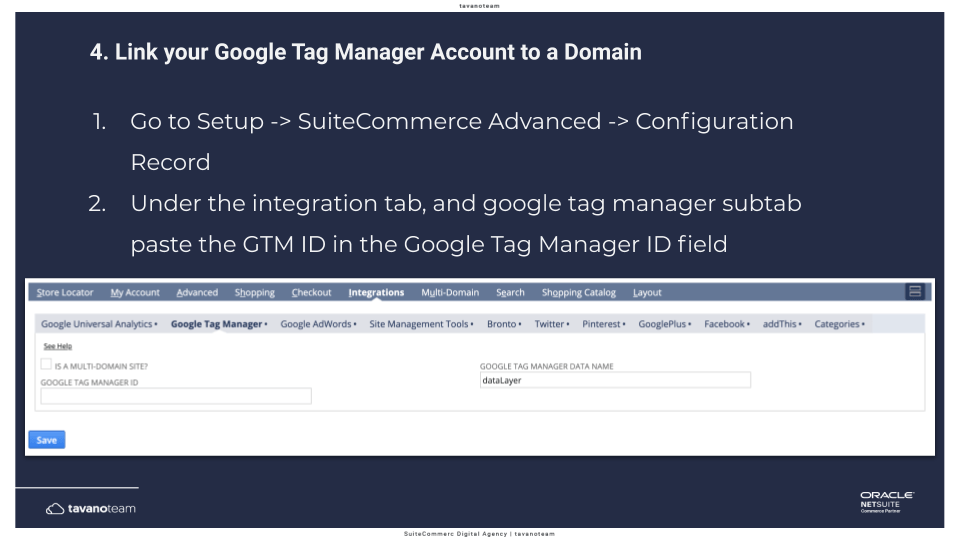
To add your Google Tag Manager ID to the Configuration Record, go to your NetSuite Admin and go to Setup > SuiteCommerce Advanced > Configuration.
There is a field under the Integration tab and the Google Tag Manager subtab. Paste here your Google Tag Manager ID.
Here comes the trickiest part of the integration but bear with me. You need to enable the Google API (as seen in the image below) and enable some Google Chrome extensions to do it.
You can find the step-by-step guides in the Developers Portal that show you exactly how to do it. It’s an easy step, and you can do it yourself. It only takes a bit of time.
Go to Configuration Record > Integration tab > Google Tag Manager subtab. Now paste the Google Tag Manager ID.
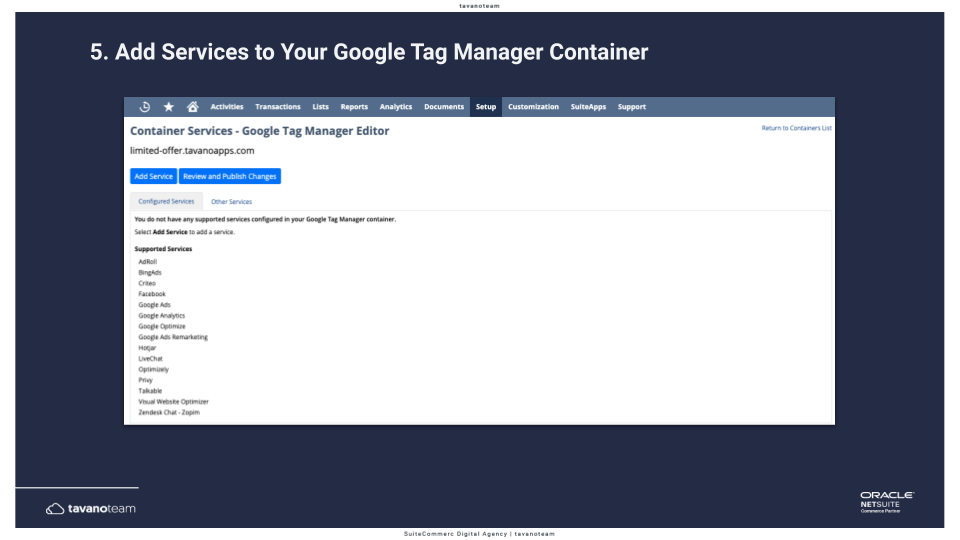
After installing the bundle, you’ll see that a new section appears on the NetSuite UI: the Google Tag Manager Editor.
Go to Setup > SuiteCommerce Advanced > Google Tag Manager Editor. You will see a page like the one pictured below.
These are the out-of-the-box services that Google Tag Manager offers you to integrate with SuiteCommerce Advanced. And you will need very little information. For example, for Google Analytics, you’ll need the UA; for Facebook, you’ll need the token and the credentials. It’s very easy.
Add the services that you want, click next, and you will see on the Google Tag Manager admin that many variables, triggers, and tags will be created. Again, this is all out-of-the-box.
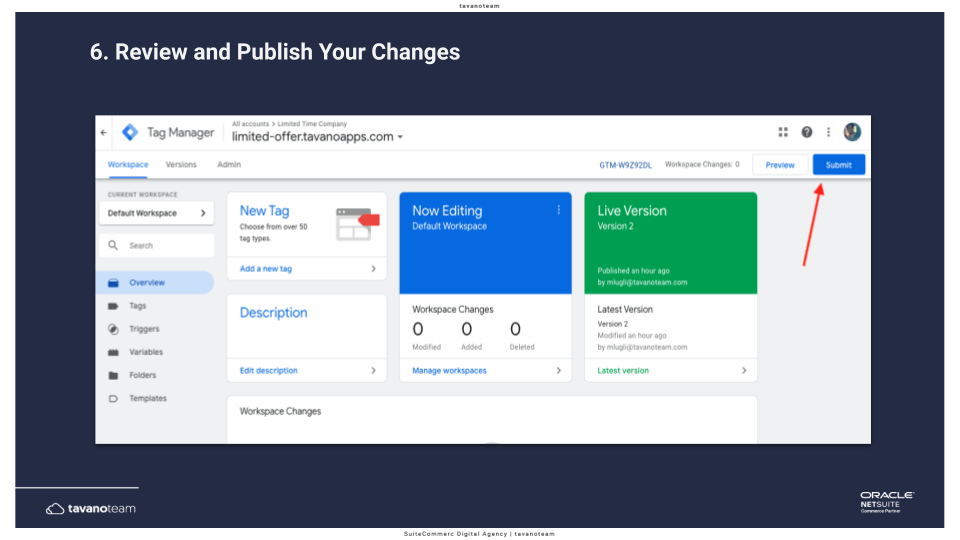
To complete the process, return to the Google Tag Manager admin to publish your changes. Before you submit them, we suggest you always go to the preview mode and check if the site is working as expected. Double check which are the tags, the triggers, and the events that are running on your website. If you see that everything is working as expected, go ahead and submit the changes.
And with this, you’re done! You now learned the standard implementation of Google Tag Manager in a SuiteCommerce Advanced for 2018.2 or later versions. The procedure for versions Aconcagua or earlier is slightly different, but we’ve got you covered: Install Google Tag Manager in SuiteCommerce Advanced – Aconcagua or earlier.
I covered this information in our Google Analytics Configuration Secrets webinar, and the video below shows the tutorial for installing Google Tag Manager on SuiteCommerce Advanced.
If you have questions about Google Tag Manager installation, or if you want to improve your Google Analytics game in your SuiteCommerce Advanced website, drop us a line!
Most NetSuite merchants reach a point where the ERP is doing its job but the… Read More
Software and SaaS companies are often the first to adopt new tech — and they… Read More
Mailchimp is still one of the most widely used email platforms in eCommerce. If you… Read More
The term “agentic AI” gets used in every major software announcement right now, and it… Read More
If you run your business on NetSuite and you have not heard about NetSuite Next… Read More
If you're researching a Shopify-NetSuite integration, you'll run into three real contenders: Oracle's own NetSuite… Read More